The First Principle: Websites Should Allow Two-Way Communication
A website is not meant to be just a digital book or brochure that you only read. For the web to be truly useful, it must also collect information from the user and send it back to the server.
If this didn't exist, you couldn't:
- log into an account
- search for videos
- shop online
- post comments
- send messages
In short, the web would be like a one-way library - only reading, no interaction.
|
.webp)
|
The <input> Tag
- The <input> tag is the most common form element.
- It creates a box where users can type or select information.
- It's a self-closing tag, and its behavior depends on the type attribute.
Example:
<input type="text">
output:
The <label> Tag
The Problem:
An empty input box by itself is confusing. Is it for your name, your email, or maybe a password? Without context, the box is just a blank mystery.
The Solution:
We need a small piece of text that tells the user what to type.
That's exactly what the <label> tag is made for — it acts like a title or caption for a form field.
Example:
            <label>First Name:<label>
            <input type="text">
output:
Connecting a Label and Input - id + for
The Problem:
Right now, the label and input are just neighbors. The browser doesn’t know that the text “First Name:” belongs to that specific box.
We need a real connection because:
- Better Usability → If the user clicks on the label text, the input box should activate.
- Accessibility → Screen readers should announce which label goes with which input field.
The Solution:
We use a unique ID for the input and link it with the label using the for attribute.
- Give the input a unique id (e.g., firstName).
- Add the same value in the label's for attribute.
Example:
            <label for="firstName">First Name:</label>
            <input type="text" id="firstName">
Output:
Result:
- Now, clicking on “First Name:” will automatically focus the text box.
- Screen readers can correctly say: “First Name, edit text.”
- The label and input are officially paired together.
Submitting Your Form
The Problem:
Right now, we can type something into a box, but there's no way to actually send that information. We need two things:
- A container that holds all the fields together.
- A button that tells the browser, “Okay, send this!”
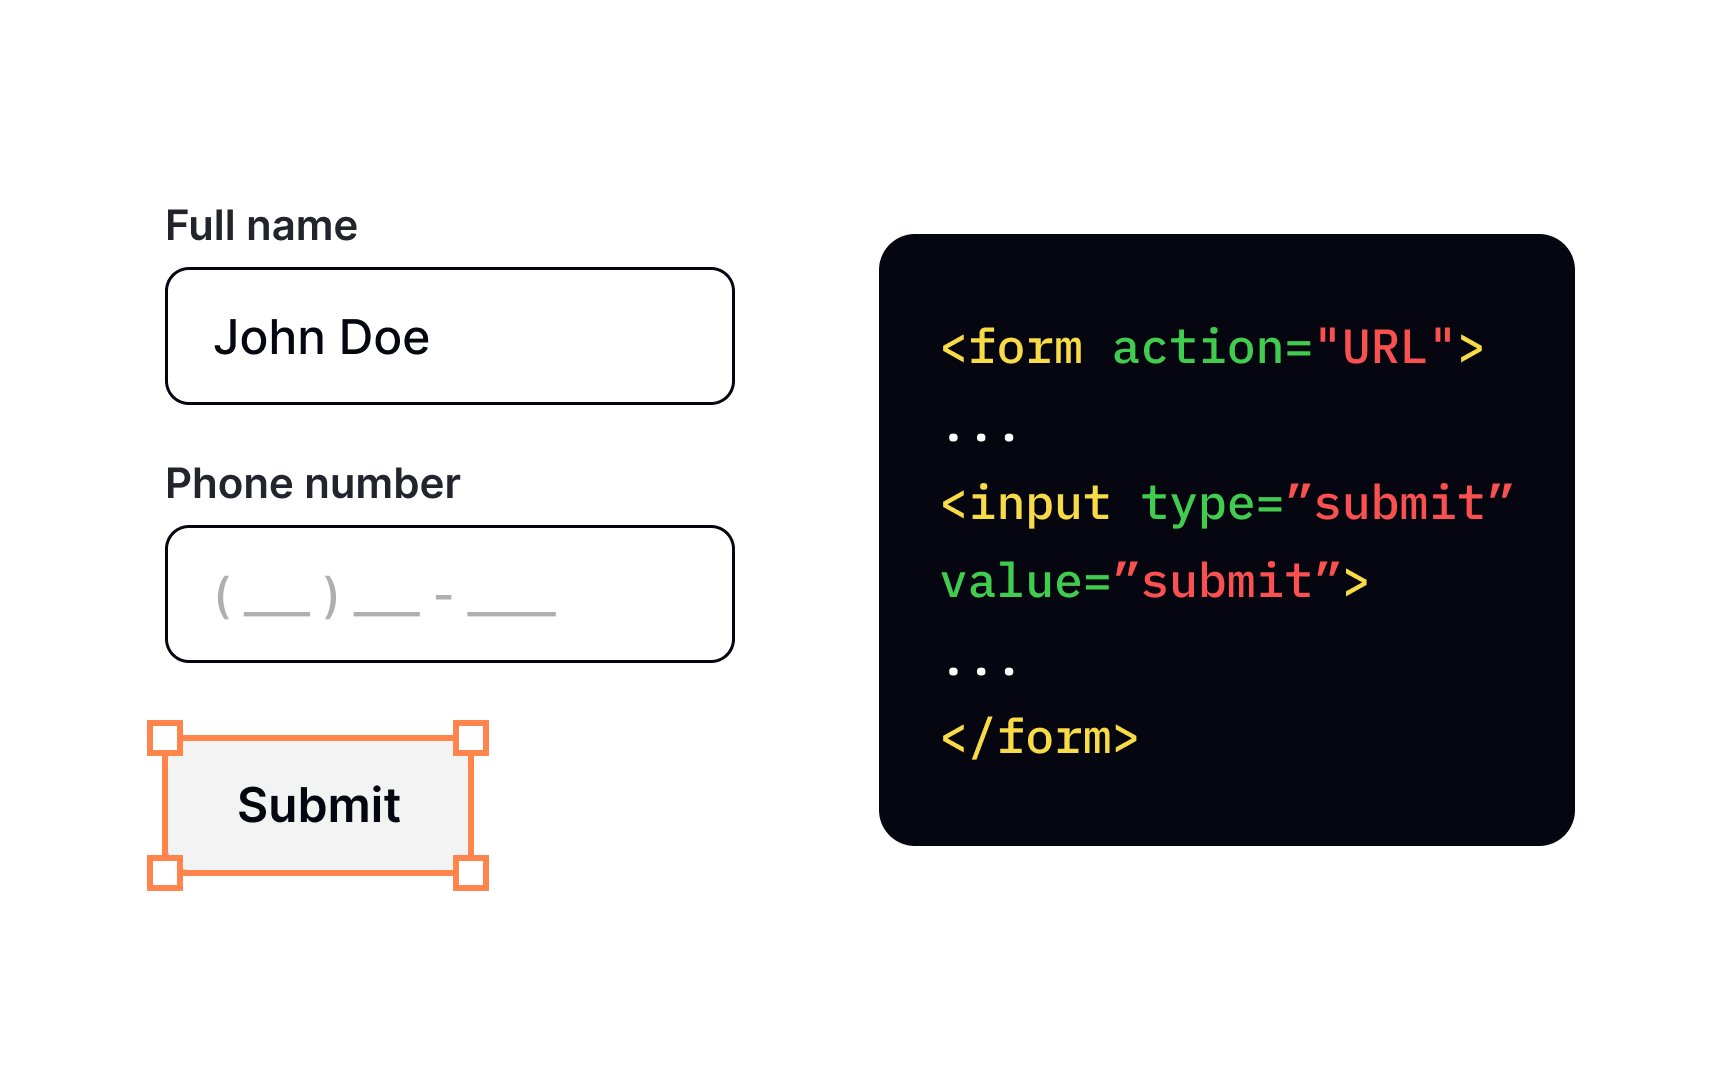
The Solution:
- We use the <form> tag to wrap all the input fields. It groups them as one single form.
- We add a submit button with <input type="submit">. This button sends the form data.
Example:
                    <form>
                        <label for="firstName">First Name:</label>
                        <input type="text" id="firstName">

                        <br><br> <!-- Simple spacing -->

                        <label for="lastName">Last Name:</label>
                        <input type="text" id="lastName">

                        <br><br>

                        <input type="submit">
                    </form>
|
|
Output:
The Name Attribute
The Problem:
When you hit Submit, the form needs to send your data to a server. But here’s the issue: how does the server know what each piece of data means?
For example:
- If someone types Priyanka in the first box… how will the server know that it’s the First Name and not the Last Name?
- The id is only for use inside the page (like linking a label to a box). It is not sent to the server.
The Solution:
We use the name attribute.
- The name acts like a label or key for the data.
- Whatever the user types becomes the value.
- Together, they are sent to the server as a pair: name = value.
Example:
        <form>
            <label for="firstName">First Name:</label>
            <input type="text" id="firstName" name="firstName">

            <br><br>

            <label for="lastName">Last Name:</label>
            <input type="text" id="lastName" name="lastName">

            <br><br>

            <input type="submit">
        </form>
Output:
Result:
Now, when you submit:
- If you typed Priyanka → it's sent as firstName = Priyanka
- If you typed Lakhara → it's sent as lastName = Lakhara
Radio Buttons
The Problem:
Sometimes, you want the user to pick only one option from a set. For example:
- Gender: Male / Female / Other
- T-shirt Size: Small / Medium / Large
If you use a normal text box, people might type anything (“med”, “M”, “medium”), and your data becomes messy.
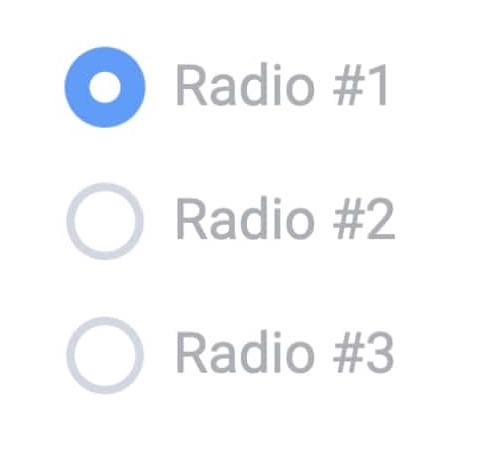
The Solution:
Use radio buttons. They look like small round circles. When you select one, the others automatically get unselected.
All radio buttons that belong to the same question must have the same name attribute. That’s how the browser knows they’re a group.
Example:
        <!-- Add this inside the <form> -->

            <label>T-Shirt Size:</label>
            <br>

            <!-- All belong to one group: "shirtSize" -->
            <input type="radio" id="sizeS" name="shirtSize" value="small">
            <label for="sizeS">Small</label>
            <br>

            <input type="radio" id="sizeM" name="shirtSize" value="medium">
            <label for="sizeM">Medium</label>
            <br>

            <input type="radio" id="sizeL" name="shirtSize" value="large">
            <label for="sizeL">Large</label>
            <br><br>
Output:
Breaking Down the Attributes:
- type="radio" → Creates the round radio button.
- name="shirtSize" → Groups them together. Only one can be selected.
- id="sizeS" → Unique ID for each option, so labels can connect.
- value="small" → The actual data sent to the server. Example: if “Small” is selected, the form sends
Checkboxes
The Problem:
Sometimes you want users to choose more than one option.
Example: “Which toppings do you want on your pizza?”
- A radio button won't work here, because it only allows one choice.
The Solution:
Use checkboxes. These are little square boxes that can be ticked ✅ or left empty.
Just like radio buttons, if the checkboxes belong to the same question, they should share the same name attribute (example: toppings).
Example: Pizza Toppings Selector
        <label>Pizza Toppings:</label>
        <br>

        <input type="checkbox" id="toppingPep" name="toppings" value="pepperoni">
        <label for="toppingPep">Pepperoni</label>
        <br>

        <input type="checkbox" id="toppingMush" name="toppings" value="mushrooms">
        <label for="toppingMush">Mushrooms</label>
        <br>

        <input type="checkbox" id="toppingOni" name="toppings" value="onions">
        <label for="toppingOni">Onions</label>
        <br><br>
Output:
Breaking It Down:
- type="checkbox" → Creates the square checkbox.
- name="toppings" → Groups them into the same category.
- id="toppingPep" → Unique ID for each option, so its label can connect.
- value="pepperoni" → Actual data that gets sent if checked.
Result:
The user can tick as many boxes as they like. For example, they can order a pizza with Pepperoni + Mushrooms + Onions all together.
<Button> In Form
The Problem:
Our old button made with
<input type="submit">
works, but it’s very basic. You can only write plain text using the value attribute. What if you want bold text, or even an image inside the button?
- A radio button won’t work here, because it only allows one choice.
The Solution:
Use the <Button> tag.
Unlike <input>, it’s a container → meaning you can put other HTML elements inside it.
Example:
            <!-- OLD WAY -->
            <input type="submit" value="Submit Your Order">

            <!-- NEW WAY -->
            <button type="submit">
                <strong>Submit</strong> Your Order
            </button>
Output:
Textarea
The Problem:
A single-line input (<input type="text">) is fine for a name or email, but it’s terrible for longer text like comments or addresses. The text just scrolls sideways and is hard to read.
- A radio button won’t work here, because it only allows one choice.
The Solution:
We use the <textarea> element. Unlike <input>, it has an opening and closing tag. It can also be linked to a <label> using the for and id attributes.
Example:
            <label for="comments">Any special instructions?</label>
            <br>
            <textarea id="comments" name="comments" rows="4" cols="50"></textarea>
            <br><br>
Output:
Dropdown (select)
The Problem:
Radio buttons are good for 2-4 options, but what if you need the user to pick from a long list (like a country)? Hundreds of radio buttons would make the page too long.
- A radio button won't work here, because it only allows one choice.
The Solution:
Use a dropdown menu. The dropdown is created with <select>, containing multiple <option> tags.
Example:
        <label for="country">Country:</label>
        <br>
        <select id="country" name="country">
            <option value="">--Please choose an option--</option>
            <option value="in">India</option>
            <option value="us">USA</option>
            <option value="uk">United Kingdom</option>
            <option value="au">Australia</option>
        </select>
        <br><br>
Result:
More Specialized Inputs
HTML5 added many new types for <input> to make forms smarter and easier for users.
type="password"
The Problem:
We need a field for sensitive information (like a password) that shouldn’t be visible as the user types.
The Solution:
Use <input type="password">. The browser masks the input with dots or asterisks.
Example:
        <label for="userPass">Password:</label>
        <br>
        <input type="password" id="userPass" name="userPassword">
        <br><br>
Output:
type="number" with min and max
The Problem:
We want the user to enter a number (like age) but keep it within a valid range. On mobile, we want the number keypad to appear.
The Solution:
Use <input type="number"> with min and max.
Example:
        <label for="birthDate">Date of Birth:</label>
        <br>
        <input type="date" id="birthDate" name="dob">
        <br><br>
Output:
type="date"
The Problem:
If we ask users to type a date (like MM/DD/YYYY), they might make mistakes in the format.
The Solution:
Use <input type="date">. Most browsers will show a built-in calendar picker that makes it easier to select a date correctly.
Example:
        <label for="birthDate">Date of Birth:</label>
        <br>
        <input type="date" id="birthDate" name="dob">
        <br><br>